
YOUR Sourdough Journey
A Mindful Beginner’s Guide to Sourdough
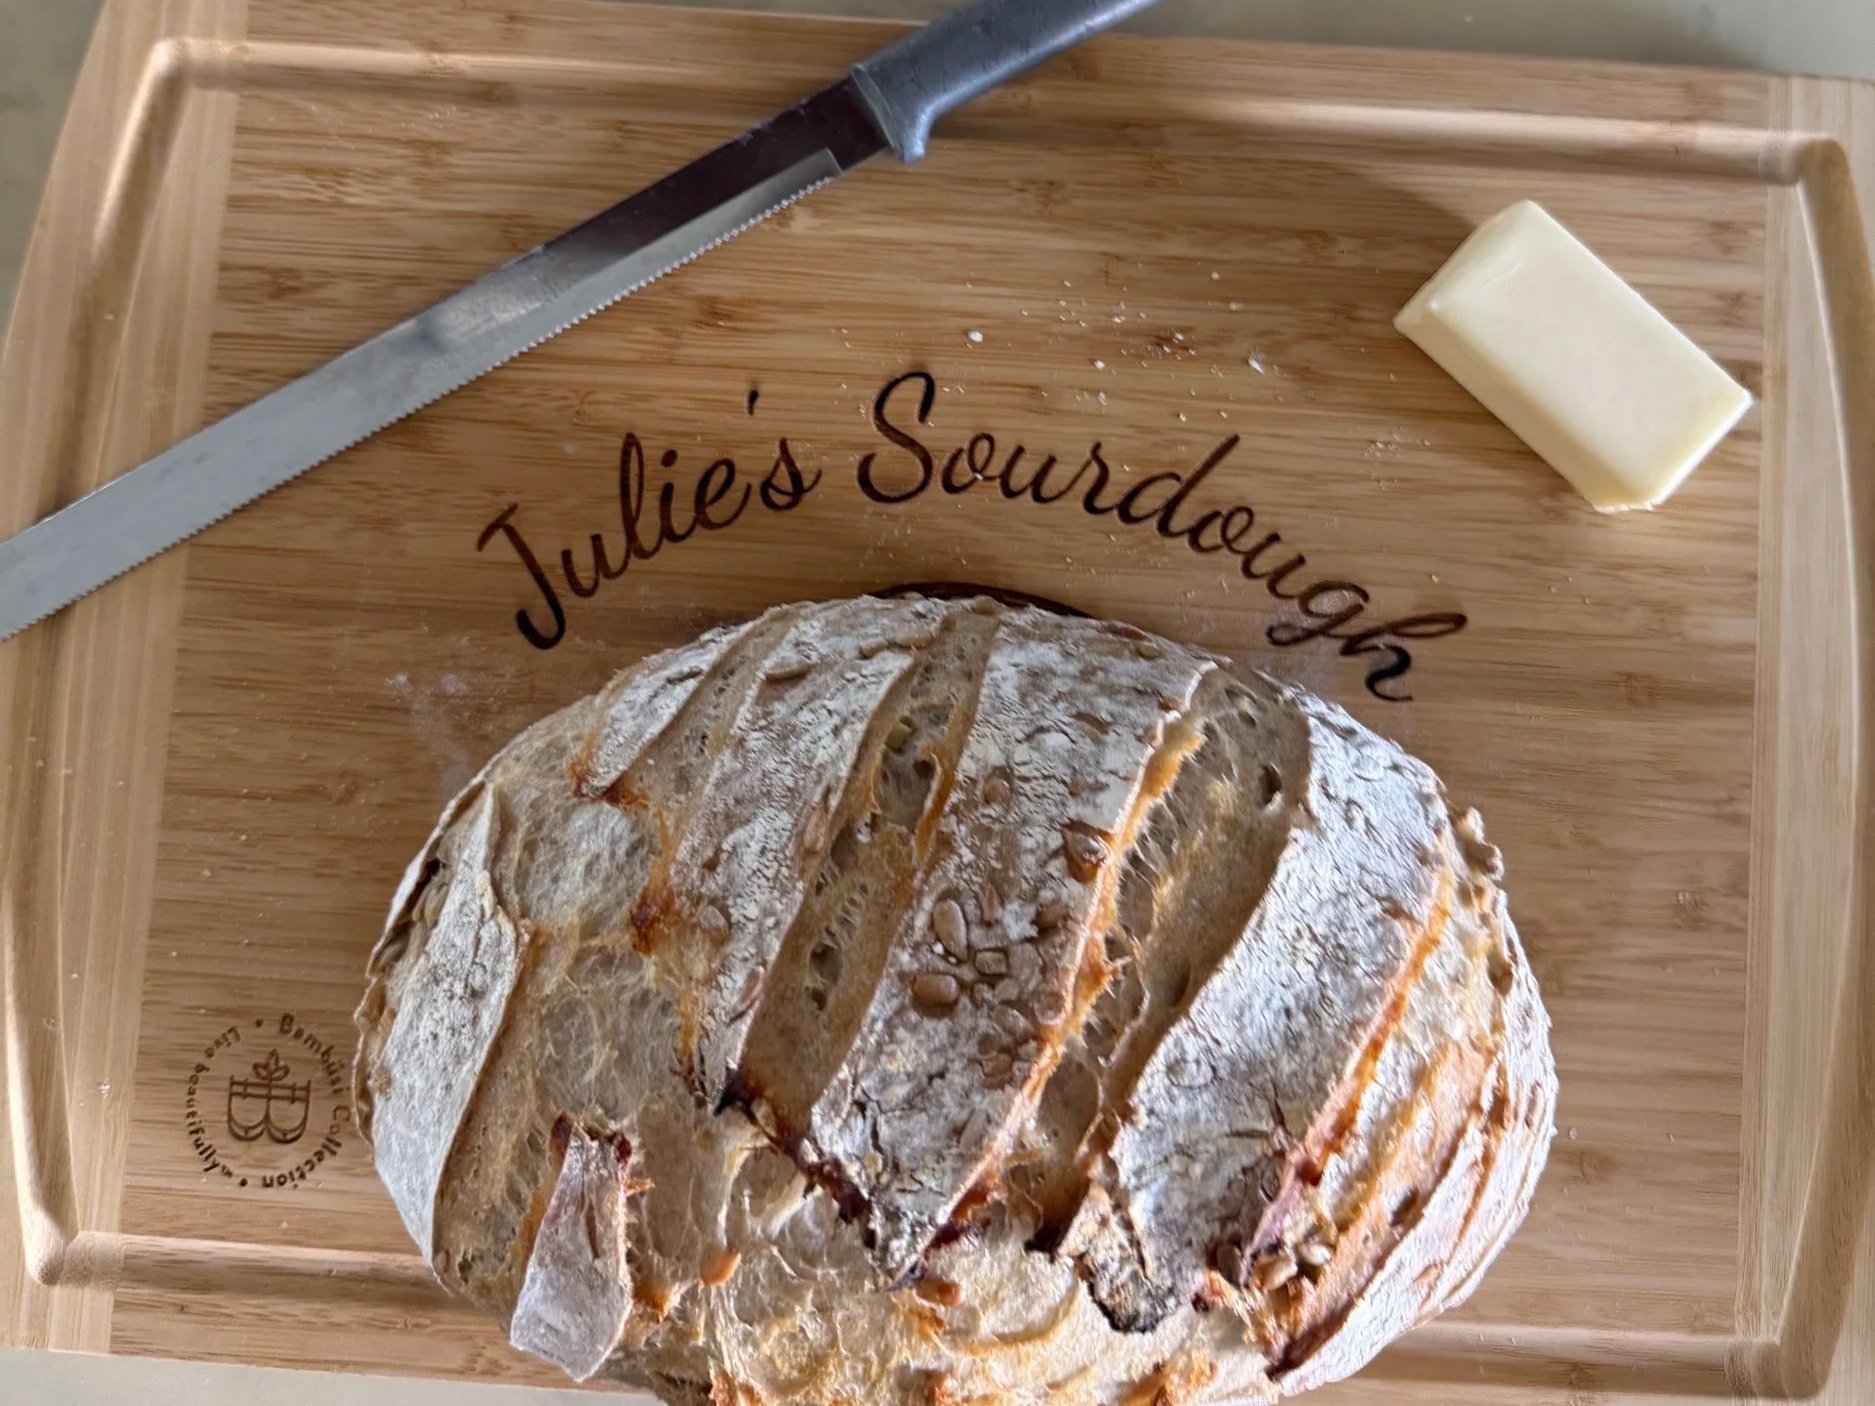
Welcome! I’m so glad you’re here.
This is your sourdough journey.
It won’t look exactly like mine—and that’s part of the fun.
I’m going to share the tips, ideas, and simple steps that have helped me along the way. Some of my lessons came from loaves that didn’t turn out quite as planned. Some came from watching and learning from other bakers. And some I’m still learning as I try new recipes and get to know my starter a little better.
That’s one of the things I love most about sourdough.
You keep learning. Your starter keeps teaching you. And no two journeys are exactly alike.
Throughout the course, you’ll find short videos to guide you through each step. Watch, pause, try it yourself, and find the rhythm that works for you.
And when your dough needs time to rest, you get to rest too.
I’ve included a couple of gentle yoga practices you can enjoy while your dough rises.
Let the dough rise while you slow down.
🌾 Before We Begin: Find Your Starter
You’ll need an established sourdough starter for this course.
Ask a friend who makes sourdough if they have some to share. You can also put the word out on Facebook or in a local community group. Sourdough bakers are often happy to pass along a little starter and help someone else begin their journey.
Once you have yours, we’ll learn how to feed it, care for it, understand it—and eventually bake with it.
You don’t have to know everything before you begin.
Start where you are. Pay attention. Be patient. Enjoy the process.
Let’s begin your sourdough journey.
Gather Your Supplies
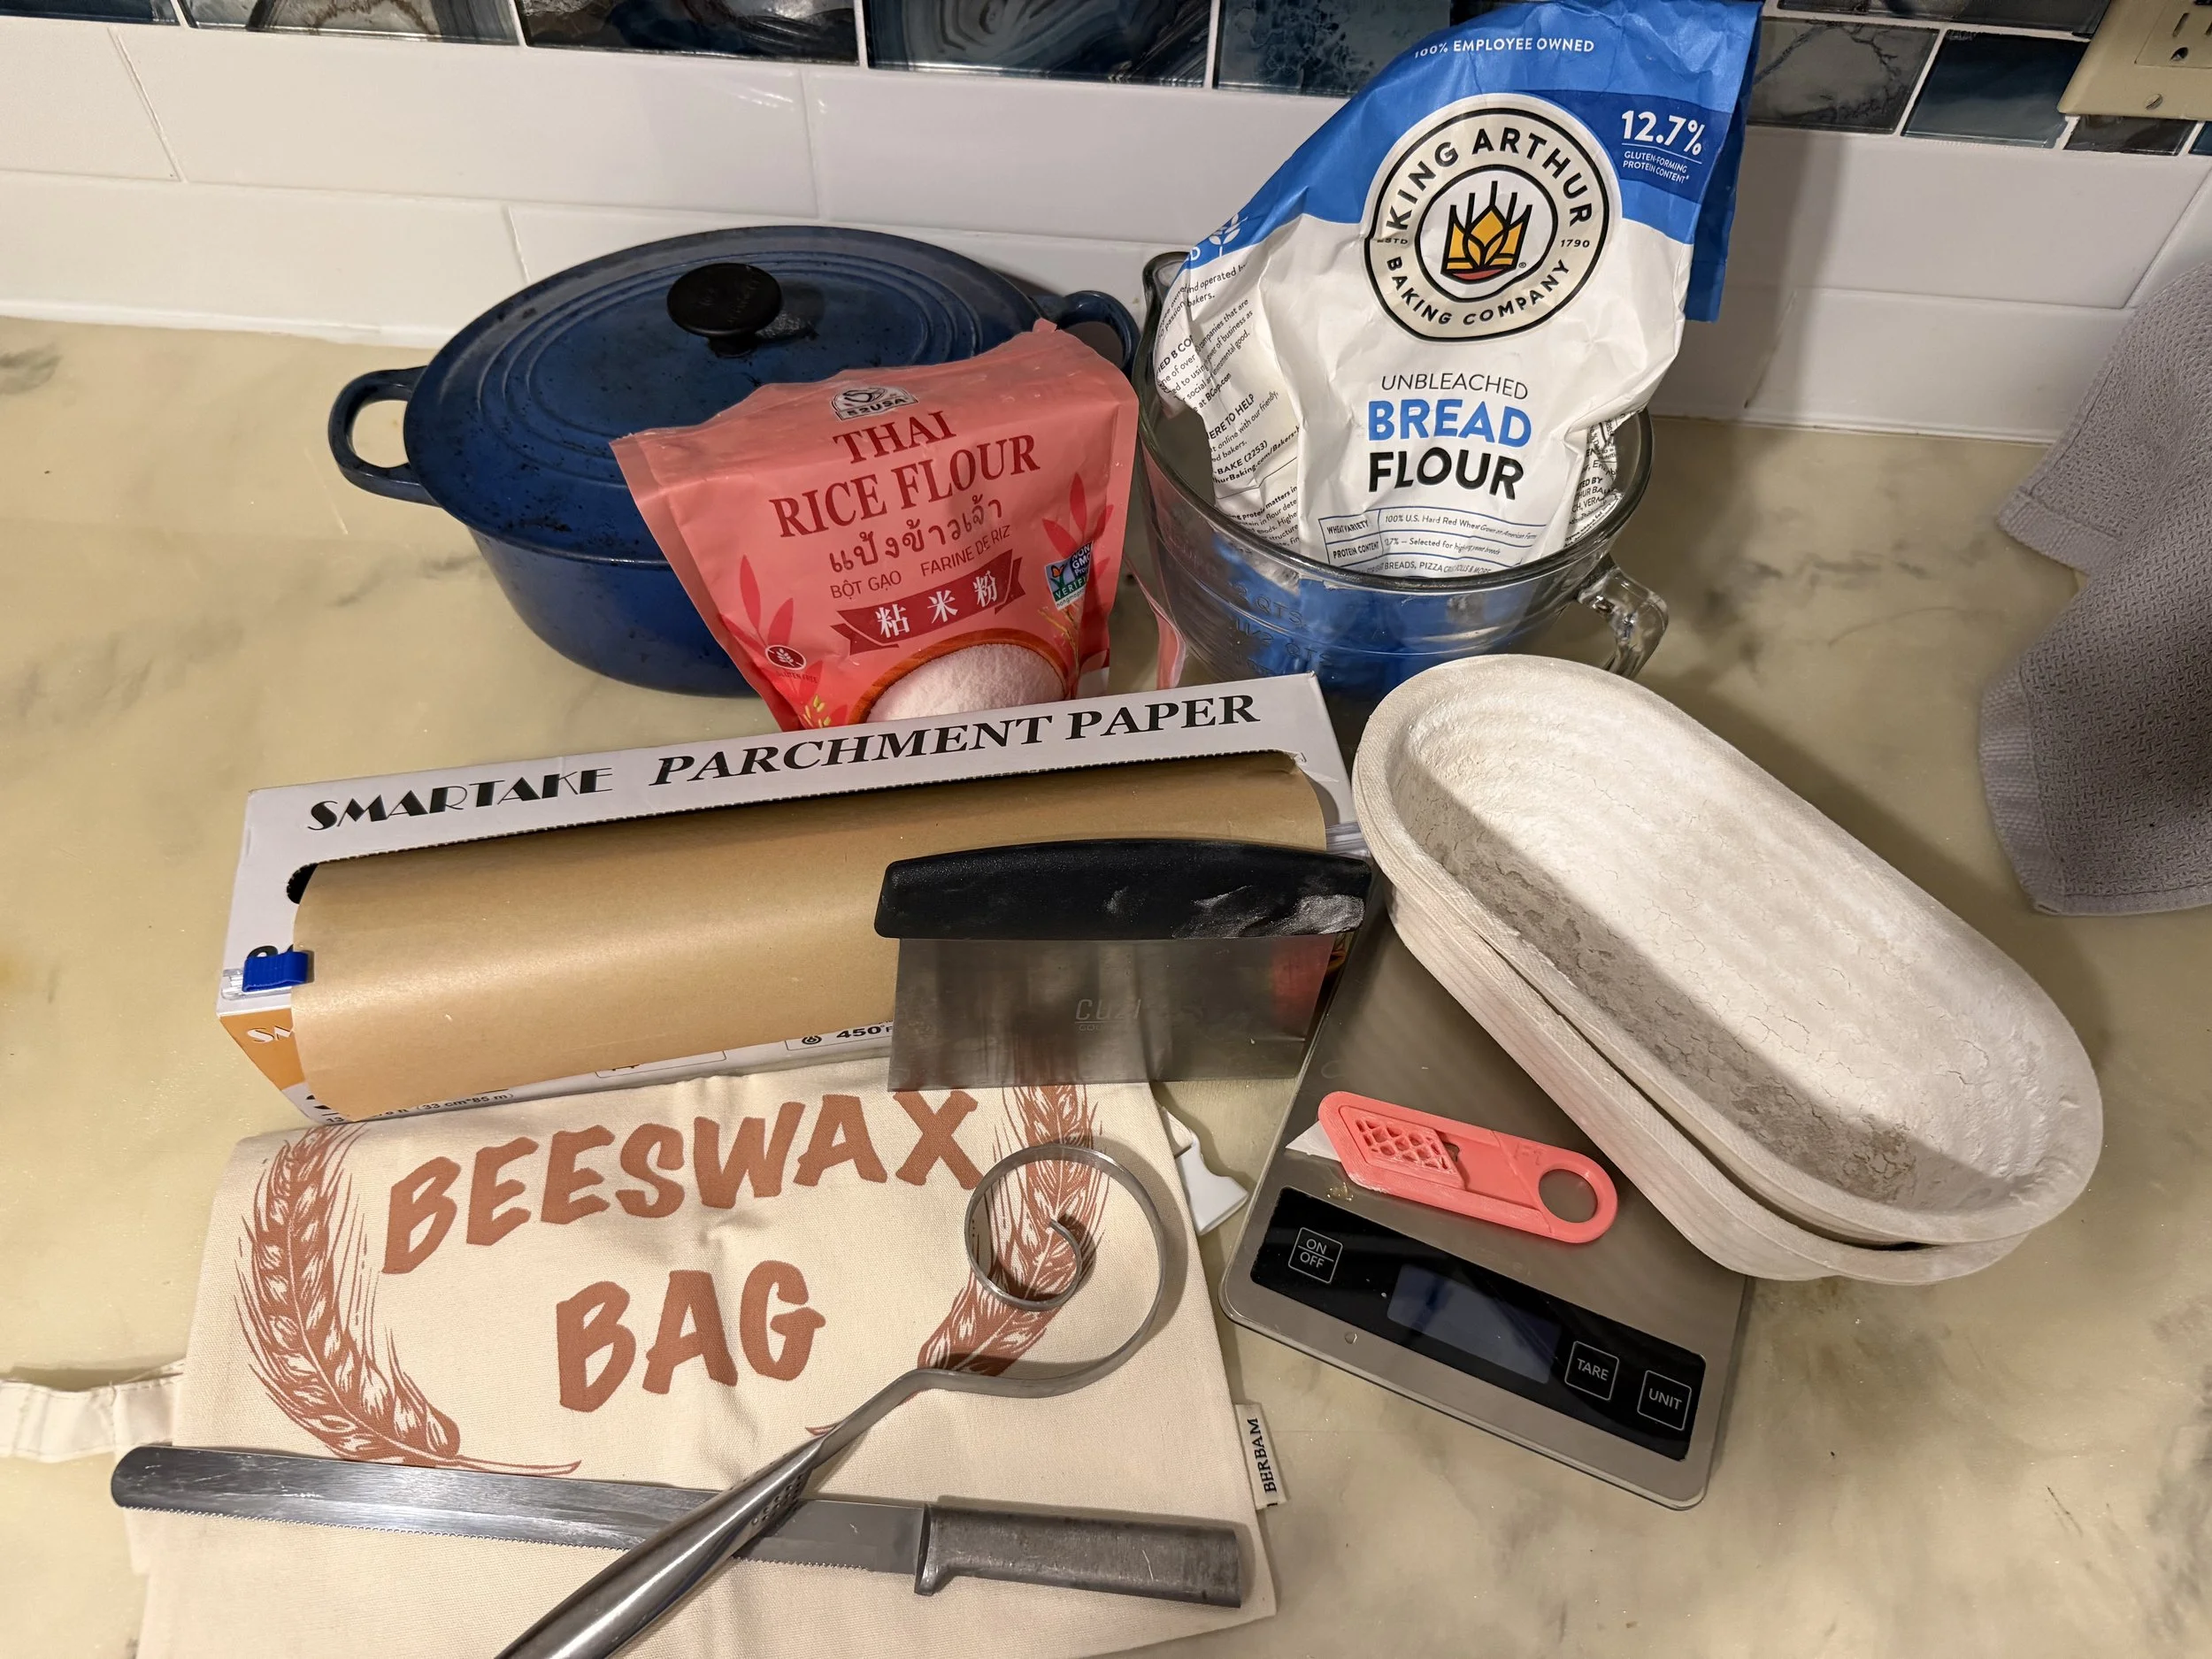
You don’t need a kitchen full of special equipment to make sourdough, but a few good supplies can make the process much easier. I’ve learned through trial and error that some things really do make a difference—especially the bread flour and parchment paper I use.
I’ve gathered my favorite sourdough supplies in one place, with photos and links, so you can easily see what I use and choose what works for you.
→ See Julie’s Sourdough Supply List
Remember, you don’t need everything to begin. Start simple. You can always add as you go.
Understand Your Starter
Understand Your Starter
Your starter may seem a little mysterious at first—but don’t be afraid of it! It’s much more resilient than you might think.
Here are a few simple things to know:
It’s alive.
Your starter is a living culture of wild yeast and beneficial bacteria.
It needs nourishment.
Flour and water give your starter what it needs to grow, bubble, and rise.
It needs time.
Sometimes you’ll see lots of activity, and other times it may seem quiet. Give it time and learn to notice its rhythm.
It can bounce back.
Your starter may get hungry, watery, or sluggish. That doesn’t mean you’ve ruined it. A little nourishment, warmth, and care can often bring it right back.
Your starter is resilient—and so are you.
There is strength inside your starter that you can't always see. With nourishment, patience, rest, and care, that strength begins to show itself.
We aren't so different.
We need to be nourished. We need rest. We need time. And sometimes we need a little extra care before we're ready to rise again.
🍞 Now, give your starter a name!
You’re going to spend a lot of time together. I named my starter cousin Stacia. What will you name yours?
Feed it. Observe it. Give it time. Love it. And don’t be afraid of it.
Activate Your Starter
It’s time to wake up your starter!
We’re going to keep this simple and use a 1:1:1 ratio:
1 part starter • 1 part water • 1 part flour
For example:
50g starter + 50g water + 50g flour
Mix everything together in your jar.
Place a rubber band around the jar to mark the starting level. Leave your starter on the counter and give it some time.
Now, watch for the magic.
🫧 Look for bubbles, growth, and a starter that begins to rise above your rubber band.
Every starter moves at its own pace, so don't worry if yours doesn't look exactly like mine. Temperature, flour, and even your kitchen can affect how quickly it becomes active.
Observe it. Give it time. Let your starter show you when it's ready.
🌾 Keeping Your Starter Happy
This is a simple process—but starters can bring up a lot of questions! Here are a few things I've learned along the way.
If you bake daily, keep your starter on the counter.
A starter kept at room temperature needs regular feeding. How often depends on your kitchen, your feeding ratio, and how quickly your starter uses its food.
If you bake weekly, let the refrigerator do the work.
Your refrigerator slows everything down. An established starter can often stay refrigerated for a week or two between feedings.
Going away? Your starter can take a vacation too!
Give it a good feeding and tuck it into the refrigerator. When you return, feed it and give it time to become bubbly and active again. It may take a couple of feedings to wake back up.
Watery starter? It's probably hungry.
Liquid on top doesn't necessarily mean something is wrong. Pour it off or stir it in, then give your starter a fresh feeding.
A strong smell can mean it's hungry, too.
A hungry starter can smell very sour, vinegary, or even a little like alcohol. Often, it simply needs food.
Plastic wrap is perfectly fine.
You don't need a fancy lid. Cover your jar and make sure there's plenty of room for your starter to rise.
Have extra starter?
Plain, unused starter can go back into your jar and be fed, or you can keep a separate discard jar in the refrigerator for other recipes.
Know when it's really time to start over.
Fuzzy mold or unusual pink or orange discoloration is different from normal liquid or a strong smell. That's when it's safest to discard your starter.
🫧 Remember
Your starter doesn't have to behave exactly like mine.
Watch the bubbles. Watch the rise. Get to know your starter.
The more time you spend with it, the more you'll begin to understand its rhythm.
Feed it. Observe it. Give it time. Love it—and don't be afraid of it!
Mix the Dough
Now it’s time to make your dough!
This step is actually pretty simple. The trickiest part may be getting comfortable with your kitchen scale. Once you understand how to zero (tare) your scale as you add each ingredient, it becomes second nature.
My One-Loaf Recipe
100g active starter
325g filtered, room-temperature water
10g sea salt
475g bread flour
This is one recipe I measure precisely every time.
You may eventually want to double it and make two loaves—I often do! But for now, start with one loaf and get comfortable with the process.
Mix It Together
Combine your ingredients until all of the flour is incorporated and you don't see dry patches.
You don't need to knead it or overmix it. Just bring everything together.
And don't worry too much about how your dough looks right now!
It may look rough, sticky, and a little messy. Your dough is going to change quite a bit once we begin our folds.
For now, mix it, cover it, and trust the process.
It doesn't have to look like bread yet. We're just getting started.
Record & Fold
Now you get to watch and feel your dough begin to transform.
Set your timer and complete four rounds of folds:
Fold 1 → after 45 minutes
Fold 2 → 30 minutes later
Fold 3 → 30 minutes later
Fold 4 → 30 minutes later
Keep track of each fold as you go. It’s easy to forget which one you’re on!
Before Each Fold
💧 Wet your hands so the dough doesn't stick to them.
For each round, pick up one side of your dough, gently lift it high, and fold it into the center. Turn your bowl and repeat until you've done this four times—working your way around the bowl and folding the dough into itself.
That's one round of folds!
Then cover your dough, set your timer, and let it rest until the next round.
Watch the Transformation
Each round will feel a little different.
At first your dough may feel sticky and loose. With each fold, you'll begin to notice it becoming smoother, softer, stronger, and silkier.
Don't be afraid to handle your dough. It likes to be handled, loved, and admired as it transforms.
And resist the urge to add flour just because it feels a little sticky. Wet your hands and trust the process.
Watch My Video
This is one of those steps that's much easier to understand when you can see it. Follow along with my video and watch how I handle and fold the dough.
Then notice what happens with yours.
Feel the change. Notice the transformation. Trust your hands.
Reset and Rise
Now your dough needs time to rest, grow, and transform. This stage is called bulk fermentation.
Make a note of the time you started, but you don't need to set an alarm. Your dough will guide you.
Let it rest on the counter for approximately 4–8 hours, depending on the temperature of your home. A warm kitchen will help your dough rise more quickly, while a cooler kitchen will slow things down.
Instead of watching only the clock, begin learning to watch your dough.
Look for it to grow, become airy, and show signs of bubbles and life.
🧘 While Your Dough Rests...
I invite you to rest alongside it.
I've included a gentle yoga practice to help you slow down, reset, and restore your nervous system while your dough quietly does its work.
Your dough doesn't need your attention every minute.
Neither does everything else.
Let the dough rise while you slow down.
Press play, breathe, stretch, and give yourself permission to rest too.
Strengthen and Shape
When I first started making sourdough, I didn't like this stage. It felt awkward and I wasn't quite sure what I was doing.
Now? It's one of my favorite parts of the journey.
With a little help, let your dough gently fall from the bowl onto your counter. Use your bench scraper to work with it for a minute and begin creating some shape and strength.
Next, gently form your dough into a rectangle.
As I show you in the video, bring the sides toward the center—almost like you're braiding the dough—and then roll it up.
Don't worry about making it perfect. Your hands will learn.
Into the Banneton
Give your shaped dough a quick roll in rice flour.
Place it into your rice-floured banneton with the smooth side facing down.
These are the bannetons I've used from the beginning. They were recommended to me, and I love them!
Cover your dough and place it in the refrigerator.
And that's it.
With a little practice, something that once felt unfamiliar may just become your favorite part too.
Cold Proof
While your dough rests in the refrigerator, the journey continues.
This stage is called the cold proof. The cooler temperature slows things down, but your dough continues to develop. It also becomes nice and cold, which will make it easier to score and bake in our next steps.
I've cold-proofed my dough anywhere from 12 hours to 3 days. A longer cold proof can develop a deeper, tangier sourdough flavor.
This is one of the things I love about sourdough—you can begin to discover what you like best.
🧘 Your Dough Is Resting. You Can Too.
While your dough rests, I've included another yoga practice for you.
If you've been standing in the kitchen, working all day, or simply feel like your low back could use a little attention, this practice is for you.
Your bread doesn't need you right now.
Let it rest. Let yourself restore.
When you're both ready, we'll move on to scoring and baking.
Preheat, Score & Bake
🔥 Preheat
Preheat your oven to 450°F with your Dutch oven and lid inside.
Let everything preheat completely. I often give my Dutch oven a little extra time so I know it is thoroughly heated before the bread goes in.
Once everything is hot, take your cold dough from the refrigerator.
✨ Score
Gently turn your dough out of the banneton onto a piece of parchment paper.
I recommend cutting your parchment wide enough that the sides become handles. You'll use these to safely lower your dough into the hot Dutch oven.
Using a bread lame or razor blade, carefully score the top of your dough. Watch my video to see how I do it—you don't need a fancy design!
🍞 Bake
⚠️ Your Dutch oven is extremely hot. Take your time during this step.
Holding the parchment-paper handles, gently lower your scored dough into the extremely hot Dutch oven.
Cover and bake for 30 minutes at 450°F.
Then, using your oven mitts, carefully remove the hot lid.
Bake uncovered for another 15 minutes, or until your loaf has reached the beautiful golden-brown color you like.
Carefully remove your bread and place it on a cooling rack.
Look what you made! ❤️
Cool, Slice, Store & Enjoy
You did it! Your kitchen smells amazing, your loaf is beautiful, and now comes one of the hardest parts...
Waiting just a little longer. 😊
🍞 Let It Cool
Allow your bread to cool completely before slicing. As tempting as it is to cut into that warm loaf, the inside is still finishing its work.
Give it time.
🔪 Slice
Once your bread has cooled, cut the loaf down the middle.
Take one half and place it cut-side down on its belly. This gives you a nice, stable surface for slicing.
Then simply slice downward into pieces as thick or thin as you like.
Watch my video to see how I do it.
🌾 Store
For bread you'll be enjoying soon, I like using a beeswax bread bag or wrap.
If you want to keep it longer, slice your loaf first and freeze the individual slices. Then you can take out exactly what you need and toast it straight from the freezer.
I prefer not to store my sourdough in the refrigerator because bread tends to stale more quickly there. Plastic bags at room temperature can also trap moisture and soften that beautiful crust.
And Now...Enjoy!
Toast it. Share it. Add some butter. Make a sandwich. Or just stand in your kitchen admiring the loaf you created.
You made sourdough bread!
And remember—you didn't just make a loaf. You learned to slow down, observe, adjust, trust your hands, and enjoy the process.
That's your sourdough journey. ❤️
Expand Your Horizons
You’ve made your first loaf—but your sourdough journey doesn’t have to stop there!
Once I became comfortable with the basics, I started experimenting. New recipes, new techniques, successes, surprises...and yes, a few failures along the way.
That’s part of the journey.
Below, I’m sharing some of the things I’ve made, along with short videos, photos, and ideas to inspire you.
Try something new. Make mistakes. Change things. Discover what works in your kitchen with your starter.
And most of all—have fun with it.
🌾 Keep Learning. Keep Creating. Keep Rising.
Sourdough Overnight Pizza Crust
Keep the Journey Going ❤️
Your sourdough journey is just beginning—and mine is still growing too!
I’m always experimenting with new recipes, learning from my starter, and finding simple ways to bring more movement, mindfulness, and healthy living into everyday life.
If you'd like to continue the journey with me, subscribe to my YouTube channel for more sourdough recipes, yoga practices, and new ideas as I share them.
→ Subscribe to Powerful You on YouTube
Keep learning. Keep creating. Keep taking care of yourself.
It starts with you. It ripples out.